Hardwarest
Administrator


Зарегистрирован: 10.10.2006
Сообщения: 8019
Откуда: Одесса, UA
|
|
SSP EVO X 2008-11 SST CLUTCH BASKET PRESSURE CHECK INSTRUCTIONS
CLUTCH SLIPPAGE CHECK PROCEDURE
STEP 1:
DRAIN FLUID FROM ALL 3 LOWER DRAIN PLUGS
REMOVE ALL OF THE PIPING AND HOSES NECESSARY TO ACCESS THE BLACK PLASTIC COVER
REMOVE THE FACTORY WIRING HARNESS BY TWISTING AND PULLING BACK ON THE LARGE BLACK PLUG
REMOVE ALL THE FACTORY BOLTS THAT HOLD THE BLACK PLASTIC COVER ON THE TRANSMISSION
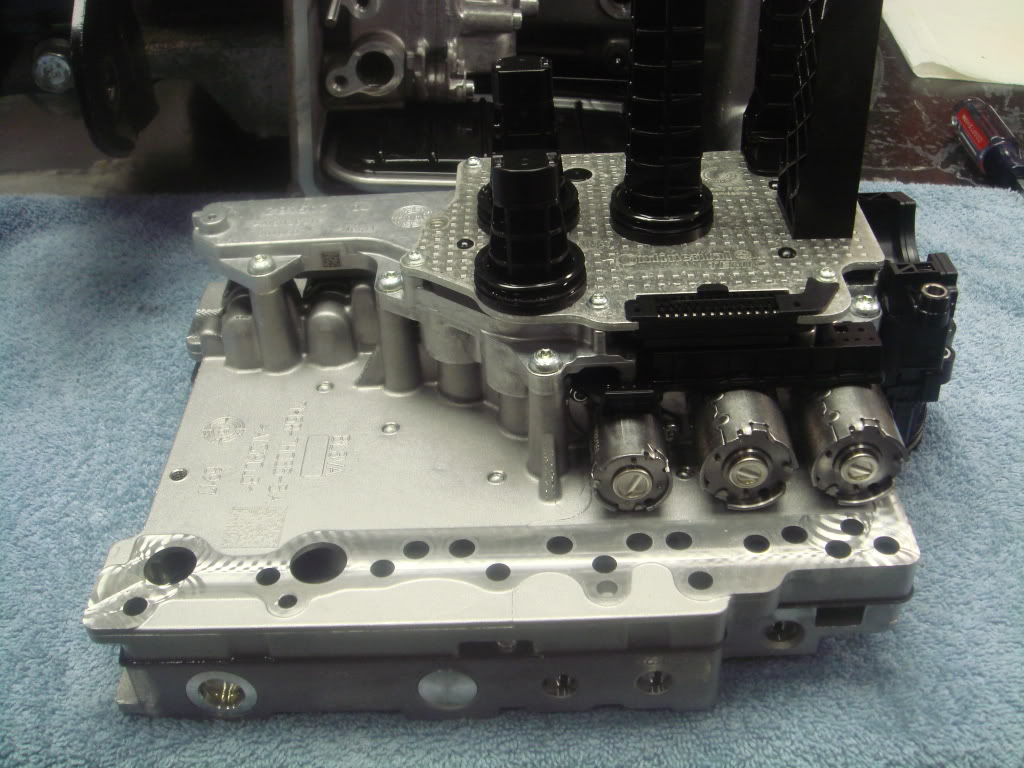
NOW YOU HAVE ACCESS TO THE VALVE BODY ASSEMBLY:
STEP 2:
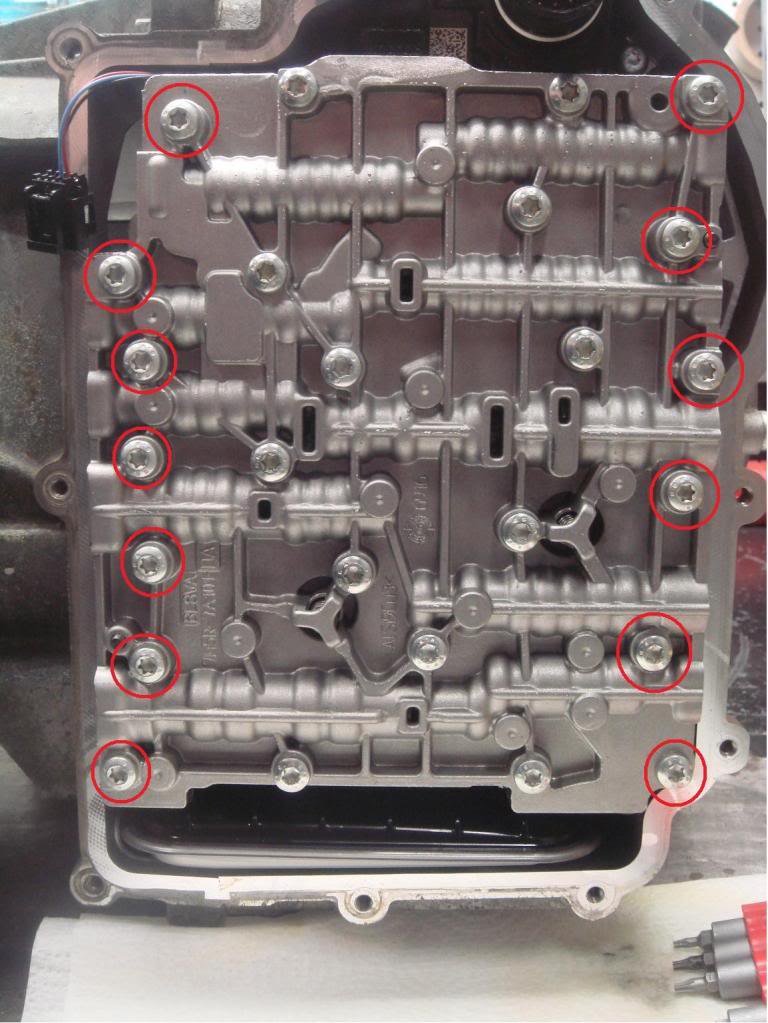
REMOVE ALL 13 BOLTS CIRCLED IN RED (DO NOT REMOVE ANY OTHER BOLTS)
When reinstalling (re torque to 10 foot pounds working from the center out)
STEP 3:
REMOVE THE OEM WIRING HARNESS BOLTS (3 BOLTS)
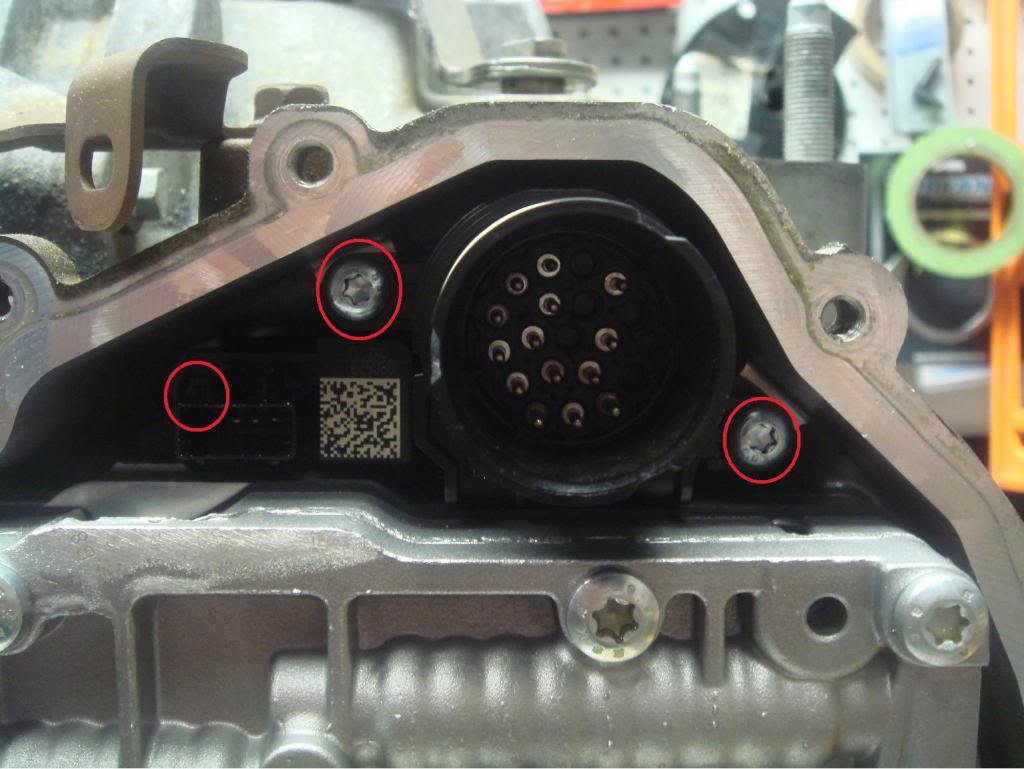
STEP 4:
UPLUG THE FACTORY WIRING HARNESS. AFTER ALL OF THE BOLTS ARE REMOVED, PULL BACK GENTLY ON THE ENTIRE ASSEMBLY. THE ASSEMBLY WILL COME STRAIGHT OUT. THE VALVE BODY ASSEMBLY WILL HAVE 5 LONG SENSOR ARMS ON THE REAR SIDE.
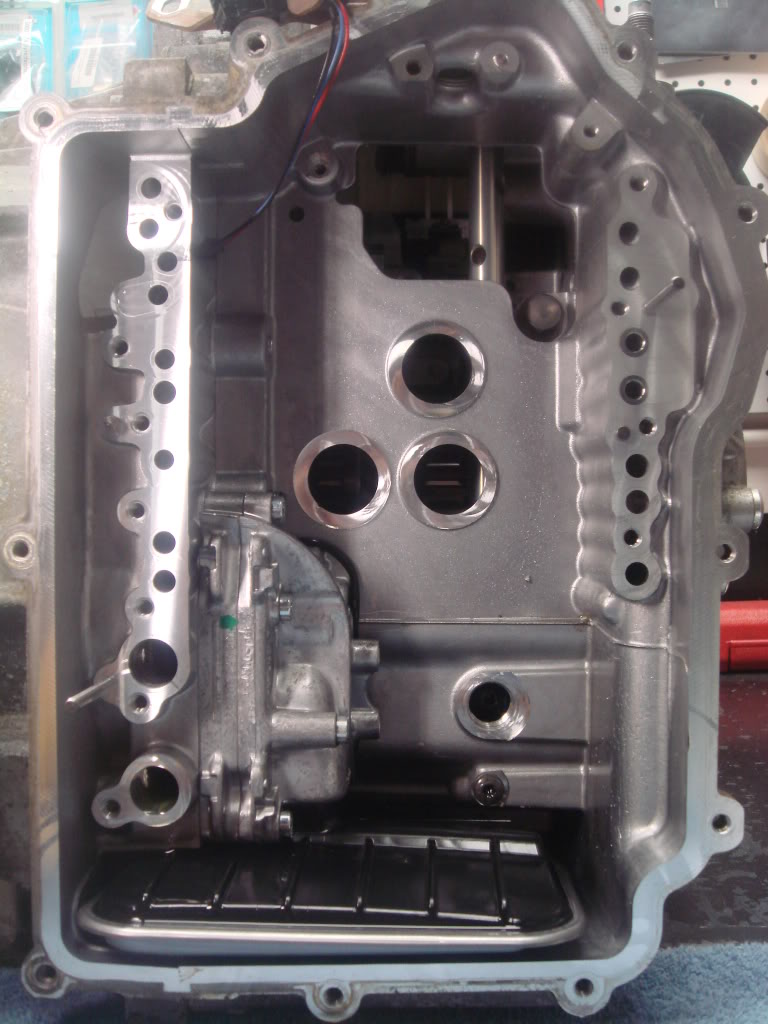
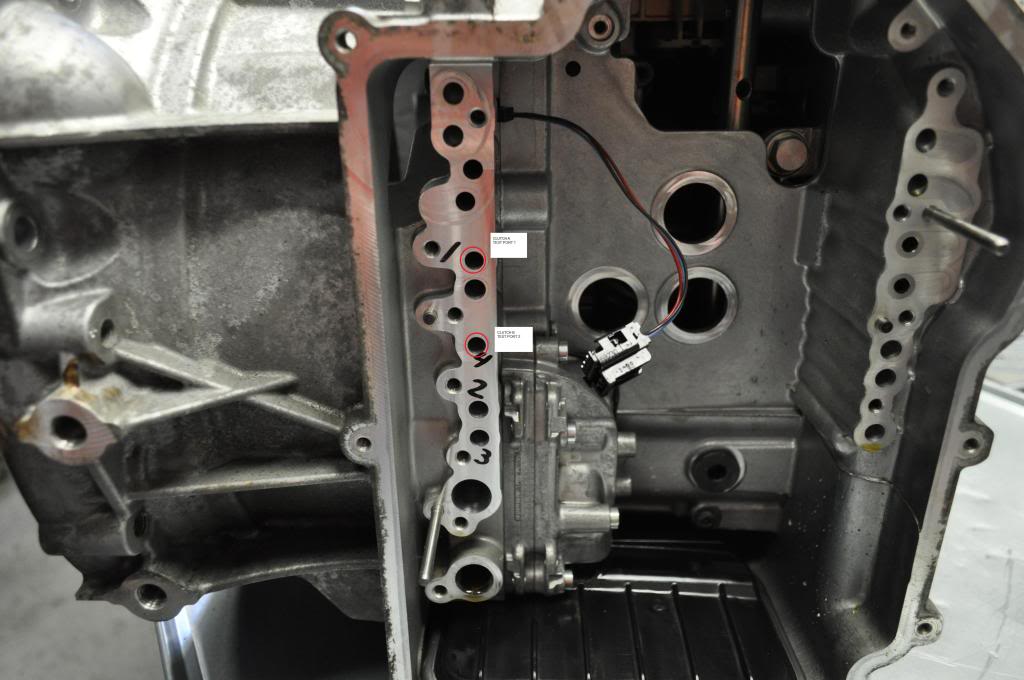
CLUTCH TEST PRESSURE PORTS (80PSI AIR) DO NOT EXCEED THIS AMOUNT OF PRESSURE
You will need to use a rubber tip nozzle to do this test with a constant 80 psi air source. Fill ports 1 and 4 first with DCT transmission fluid (small amount). Insert the rubber nozzle tightly up against ports 1 and 4 (circled in red) for 5 seconds.
Port 1 is Clutch A, if you hear blowing air, this means there is a seal problem. You should hear a thud sound. This means the clutch is properly sealing. If you hear air leaking, there is a seal problem.
Port 2 is Clutch B, if you hear blowing air, this means there is a seal problem. You should hear a thud sound. This means the clutch is properly sealing. If you hear air leaking, there is a seal problem.
If all tests are ok, then reinstall the valve body unit.
_________________
Powered by Xtreme Garage Odessa
Звонить сюда 098 110-37-61, ехать г. Одесса на ул. Чумацкую 59-а |
|
